![]()
Check out Electrex USA's website here.
Electrex USA's Dual Sport kit is the best quality kit I have seen. All of the "brains" are fit inside of a plastic container that sits behind the headlight. The quality of this kit is very impressive. Whenever brackets are needed they machine them out of billet aluminum! The instructions for this kit are very good and the diagrams make the install so easy!
Stay tuned for more pictures as I get them taken.
Installing Electrex USA's Dual Sport kit on the XR650R .
Note: The instructions that come with the Dakar kit are very detailed. I have highlighted the major steps in installing this kit
| Step 1. Remove your existing seat, front number plate, radiator covers, fuel tank, side number plates and rear fender. | |
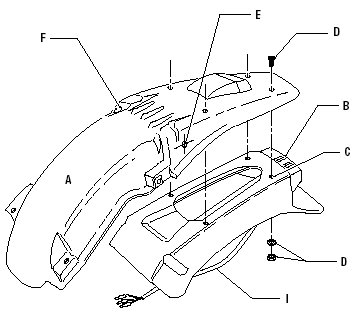 |
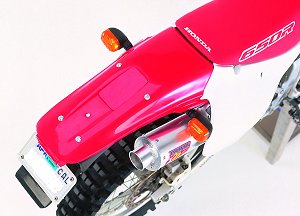
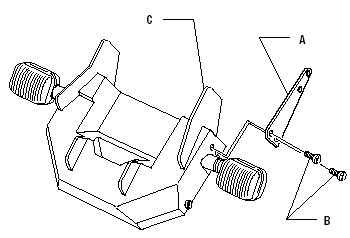
Step 2. Place the rear fender ( A ) upside down on a clean work surface
and position the rear tail light assembly ( B ) on the inside of the fender.
The tail light should rest slightly under the rear edge of the fender.
This requires enlarging the center opening by about 1/2 inch on each side
using an electric jig saw to make it fit properly. This is for clearance
to the existing top brake light. Then, using the rear tail light’s
four mounting holes ( C ) as guides, trace around each hole with a felt
tip marker on the underside of the fender creating drill hole locations.
Remove the tail light assembly and drill four |
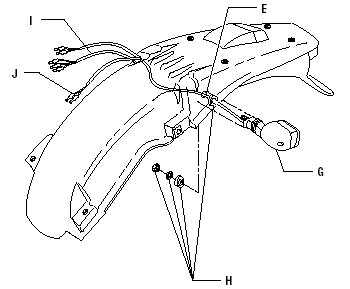 |
Step 3. Install the rear turn signals per the instructions.
|
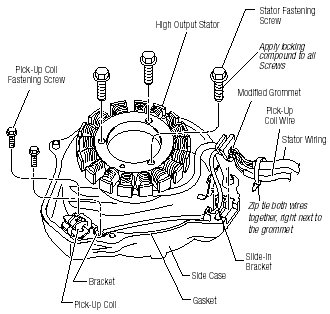 |
Step 4. Install the high output stator. IMPORTANT |
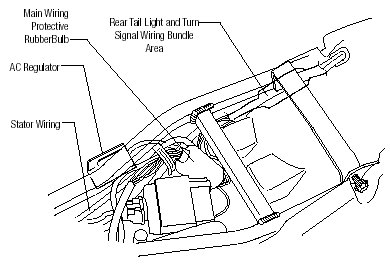 |
Step 4. Wire the taillight assembly and the rear turn signals per the instructions. |
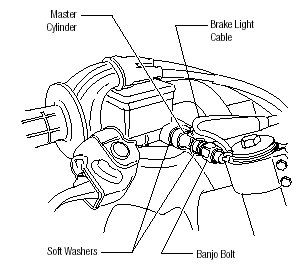 |
Step 5. Install the brake light switches. Caution: this requires removing the banjo bolts and replacing with new ones that come with the kit. Bleeding the brakes will be necessary afterwords. |
 |
Step 6. Install the headlight assembly. |
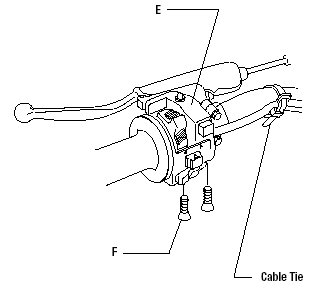 |
Step 7. Install the turnswitch assembly. |
Copyright © 1999-2009 XR650R.NET. All rights reserved.
XR650R.NET has been optimized for both MS Internet Explorer and Netscape Navigator, versions 4.0 and higher with a screen resolution of 1024x768.