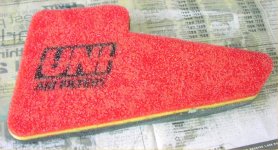
Installing the newly designed Uni Air Filter part # NU-4130ST for the Honda XR650R. Check out Uni's website here.
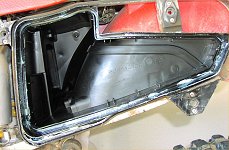
Step 1. Remove the air cleaner cover/ number plate then remove the old air filter and the backfire screen.

Step 2. Clean the inside of the airbox thoroughly.
Step 3. Oil the front and back sides of the new filter with Uni Air Filter Oil (or some other foam filter oil). Follow the instructions that come with the filter to ensure that the filter has the correct amount of oil saturation.
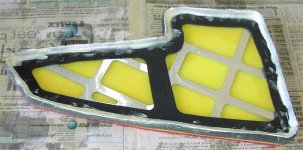
I also put a bead of grease around the lip of the inside of this new filter (see lower right photo, the grease is white). The lip is designed to fit into the groove around the inside edge of the airbox. This new groove should improve the seal between the air filter and the air box. Good job Uni!


Step 4. Put the filter in the airbox. The new filter has a much tighter seal than any other filter I have tested. I used the tip of a slotted screwdriver to gently push the edge of the foam in all the way around the filter until it was all in. Then put the air cleaner cover/ number plate back on and your done.
Notice: I left out the backfire screen for better airflow. The backfire screen is necessary with other filters to support the filter. This new design from Uni has an aluminum frame (as seen in the right photo above) that gives the filter the support needed.
Coming soon: I picked up a can of Uni's Air Filter Oil and a can of their Air Filter Cleaner. After my next ride I will report on how these two products work.
Check out Uni's website here for more info.
Copyright © 1999-2009 XR650R.NET. All rights reserved.
XR650R.NET has been optimized for both MS Internet Explorer and Netscape Navigator, versions 4.0 and higher with a screen resolution of 1024x768.
