

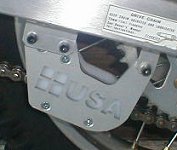
Each plate is custom designed and fitted for its particular model of bike. And handcrafted from 5/32" (.160") alloy # 5052 Aluminum. Also, openings are strategically placed to allow easy access to drain plugs and such, so that routine maintenance can be performed without moving the skidplate.
A skidplate that rattles loose and falls off after a few rides is of no use. Their plates are designed to stay put for the long haul(or ride, if you prefer). Their mounting clamps are simply the toughest in the business. Fabricated from 1/8" aircraft grade 4130 Chrome-moly steel and heat-treated to maximize their strength and ductility. A "Stover" type lock nut is welded in place to accept the 8mm grade 10.9 button head allen. And in the event that one might need to replace a clamp, they are conveniently marked with the diameter of tube which it is made to fit, so the correct one can be ordered.
Installing the Skid plate and Chain guide for the 2000-01 Honda XR650R by Utah Sport Cycle. Check out Utah Sport Cycle's website here.
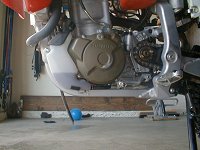
1. Remove the standard plastic skid plate that came on the bike. Then get a bucket of soapy water and a scrub brush and clean the underside of the bike thoroughly.
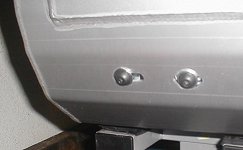
2. Next use the 5 mm allen wrench (that you took off the standard plastic skid plate) to take off all of the brackets that are on the new skid plate.
3. Place all of the brackets on the frame approximately where they will go once you fasten them to the skid plate itself. (There are six brackets in all)
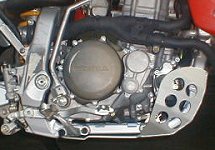
4. Hold the skid plate up where it will go and beginning with the bracket closest to the radiator overflow bottle, insert the 5 mm allen screw through the skid plate and into the bracket. Do not tighten any of the screws yet.
5. Next insert the 5 mm allen screw to the left, (the side where the water pump is).
6. Next insert the screws on the bottom nearest to the rear wheel. Then insert the middle row of screws.
7. Now you need to get a ruler and measure on each side to make sure the skid plate is centered. Once you have centered the skid plate, begin tightening the row of screws underneath nearest the rear tire. Check the skid plate to make sure it stays centered while you continue to tighten all of the screws.
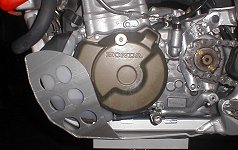
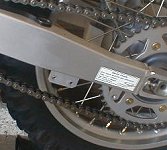
8. Here is the skid plate installed!
Installing the Chain guide.
1. Start by removing the old chain guide.
2. Install the new guide. It's that easy!
Check out Utah Sport Cycle's website here.
Copyright © 1999-2009 XR650R.NET. All rights reserved.
XR650R.NET has been optimized for both MS Internet Explorer and Netscape Navigator, versions 4.0 and higher with a screen resolution of 1024x768.